
Whipped cream dispensers help us reduce our trips to the stores. Also, they save our arms from unnecessary numbness by doing the manual whipping. Instead of buying the premade creams in the store or hand-whisking it yourself, you can use a dispenser to simplify things.
So, if you’ve just bought one and now wondering how to make whipped cream using dispenser, keep reading. We’ll share the process of making whipped cream using the dispenser. We’ll also discuss the issues you’ll likely face with the appliance and how to solve them.
What Is A Whipped Cream Dispenser?
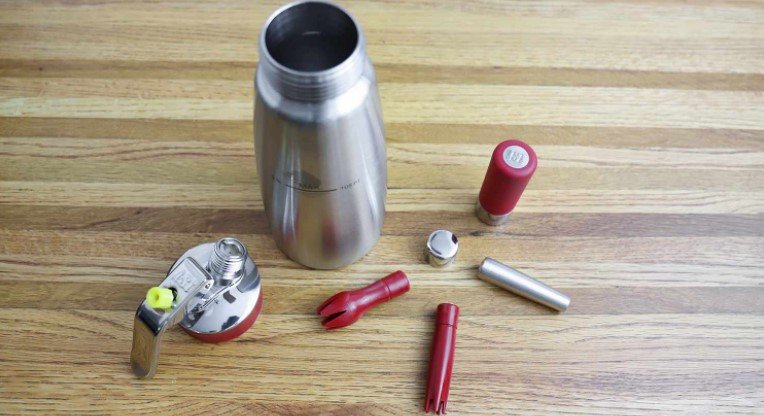
Whipped cream dispensers are kitchen tools that mix many ingredients to form a soft and pillowy texture. This tool is also known as a Canister or Siphon. It is usually hand-held and comprises many components.
First, the dispenser has a bottle where the meringue will be. This bottle comes in a stainless steel or aluminum material. The size usually falls within ¼ and 1 liter. Also, the bottle’s head features a gasket and head valve. The gaskets ensure that the bottle is airtight, while the valves provide the opening where the foams pass through.
Whipped cream dispensers also come with a charger that contains Nitrous Oxide gas. This part is mainly the whipping agent. It is responsible for the tiny bubbles that create the whipped texture of the cream.
The tip of the whipped cream dispenser is where the foamy meringue passes through to decorate your dessert.
How To Make Whipped Cream Using Dispenser?
The first thing to do before anything is to choose the whipped cream dispenser recipe you want. There are many recipes, such as chocolate-flavored whipped cream, Amaretto flavored cream, Atkins Diet cream, Patty’s Rum coffee toppling, etc.

Once you’ve picked the recipe, do the following:
Step 1: Prepare the dispenser
The whipped cream dispenser has many components, such as the piping tip, the bottle, the screws, and the gas cartridge. So, you have to clean each one and towel-dry them.
Step 2: Fix the Piping Tip
There are two types of piping tips; the tulip-shaped and the straight tip. Choose the one you want and fix it. Start by unscrewing the canister and then connect the tip to the dispenser head valve. Make sure the tip and gasket are inserted properly.
Step 3: Put the ingredients into the bottle
Pour the meringue or any other liquid into the bottle and add your flavoring. Also, you can add sugar if you want. But while adding these ingredients or other ones, make sure that they don’t cross the maximum line indicated on the bottle.
Step 4: Introduce the charger
Start by securing the dispenser’s head to its bottle. Then place the charger in its holder & screw it on the canister’s head. Ensure that the small end of the charge faces upwards as you’re screwing it. Afterward, twist the charger a little to release the gas and listen to know when the gas escapes.
Step 5: Shake the dispenser
After the sound indicating gas release, you should shake the dispenser properly to stir all the ingredients. Some people usually turn the device upside-down to ensure that everything is stirred. When you stir it correctly, the nitrous oxide mixes properly with your meringue.
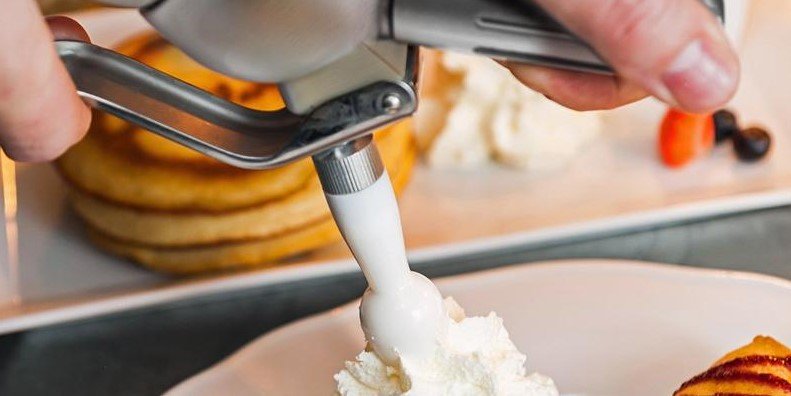
Step 6: Bring the foam out
After whipping the cream, press its liver to bring out the foam into your container. But the foam might be too runny, sometimes indicating that it didn’t complete the whipping. So, shake the cream dispenser a second time to make a good cream.
Step 7: Clean the components
After removing the whipped cream, it’s time to clean the components once again. After emptying the ingredients, go to the sink and remove the remaining pressure in the dispenser. Then, remove the bottle top and the charger. Also, remove the gasket and the head valve if it’s possible. Finally, use a brush to clean the leftovers out of the nozzle.
Use water and soap to clean the components separately. Then dry them and re-fix everything as you should.
Watch the video for a visual representation:
Common Whipped Cream Dispenser Issues and solutions
Just like other appliances, your whipped cream canister might develop some issues. Let’s check them below and discuss the simplest ways to fix them.
1. Stuck Cream
The cause of stuck cream can be a clogged nozzle or hardened cream due to excess shaking. For the clogged nozzle, shake the dispenser gently or use warm water to remove small particles. As for hardened cream, attach another cream charge to reduce it.
2. Locked dispenser
If the thread on the dispenser top twists, or you over-charge the dispenser, then it will lock. If this happens, run the canister top under hot water to loosen the stuck head. Afterward, open it with your hand towel. But if the issue persists, look for a professional to fix it.
3. Metallic Taste in cream
If you use carbon dioxide instead of N20 or Nitrous Oxide, your whipped cream will have a metallic taste. So, check the gas you’re using to ensure that it is the right one. Plus, carbon dioxide itself isn’t a good thing to consume after all.
4. Gas Leak
When you notice that the gas is leaking through the nozzle, get a new valve. That’s why you should be careful to avoid damaging the valve. Also, if the point of escape is the intersection between the canister and the head, check the gasket as it might be the issue.
5. Watery cream
Many people complain that their whipped comes out too watery. Well, if that happens, it means you didn’t shake it enough to thicken it. So, open the dispenser and check the thickness before shaking it again. But don’t over-shake the canister, or the cream will harden.
Conclusion
Using a pressurized whipped cream dispenser or canister is faster and also efficient when making your dessert toppings. Now that you know how to make whipped cream using dispenser, you’ll be able to make every dessert delicious and look good.
Once you choose your recipe and include the ingredients inside the dispenser, shake well, and that’s pretty much it! But don’t forget to keep the dispenser clean after use and also beware of issues while using it as well as afterward.